


How Do I Frame, Measure and Order a Radius Arch?
A radius arch is made up of 2 semicircular sweeps of plaster mounted on either side of a nib wall.
The essential point is that the arch sweep is half a circle therefore the height is always equal to half the diameter. They require the high ceilings typical of a Victorian dwelling.
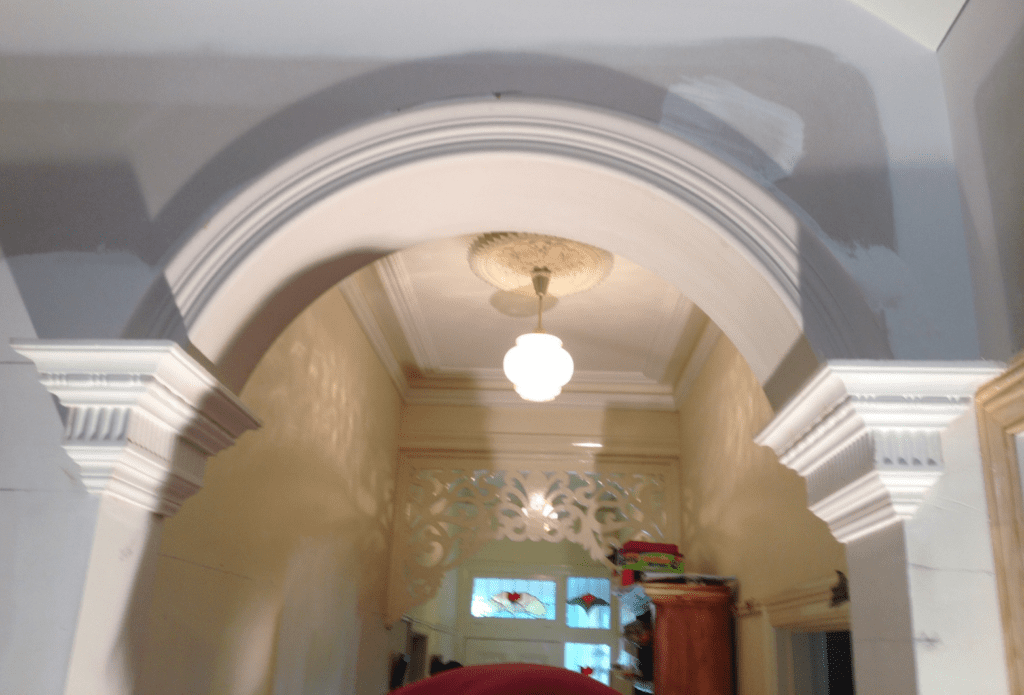
The arch is usually finished with corbels and caps at each end and an optional keystone at the top.
Where is a Radius arch used.
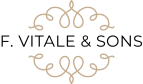
The most common location to use a radius arch is in a hallway.
They were often used in the halls of Victorian homes, where they provided decoration that was seen from the front door.
However, they can be used virtually anywhere.
The anatomy of a Radius Arch kit.
The arch sweeps are the basis of the kit.
Corbels and caps can be used to finish or provide visual a “support” for the arch.
Back in the days of stone arches the corbels were a structural necessity. Today they are purely decorative.
The outside diameter is the measurement used to order the arch.
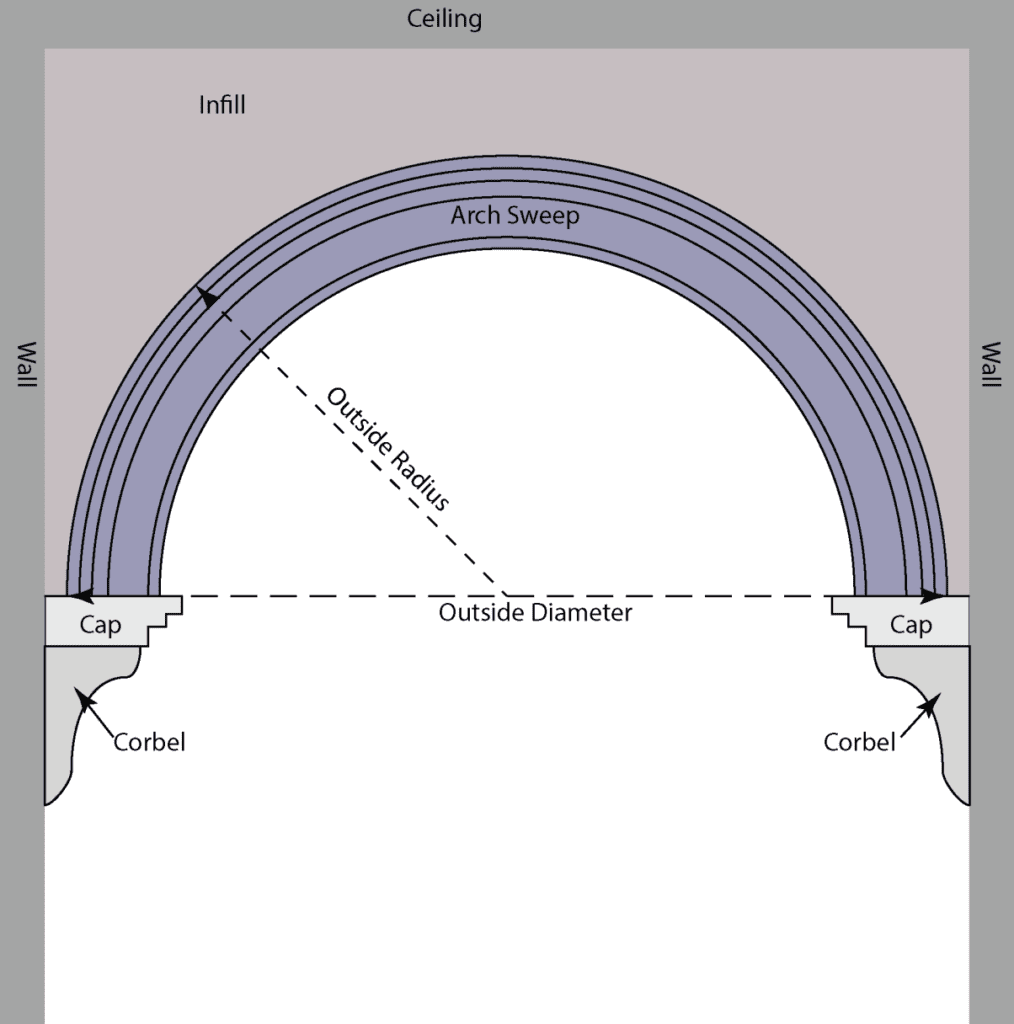
Some corbels have a built-in arch; those without require a cap that is purchased separately.
Choosing a Profile.
The profile you choose is dependent mostly on your taste. There can be times when due to space limitations it is necessary to choose a narrow profile but otherwise it just personal choice.
The range of profiles can be viewed here. When you have chosen, note the AP number and use it to order the requisite arch.
Measuring your hall.
This is the critical measurement. The outside diameter of the arch cannot be wider than the hall except in special cases. The 2 cases are when you want the arch to appear as if it is “growing” out of the wall, and when space is very tight, and the outer edge of the arch is trimmed back.
The clearance between the outside of the sweep and the wall is another critical decision. A clearance of zero or less (trimmed arch sweeps) is sometimes used when space is very tight, it can be necessary to achieve a usable passage.
Visually a clearance of from 5 to 20mm looks most appropriate. But ensure that the arch opening is adequate for the expected use.

The outside diameter of the arch = (Hall Width – Left Clearance) – Right Clearance.
Measuring the Nib.
This is the other critical measurement, not for the arch sweeps themselves but rather the selection of corbels and caps. The width of a corbel needs to be only a small amount less than the width of the nib and the cap needs to be wider than the nib.
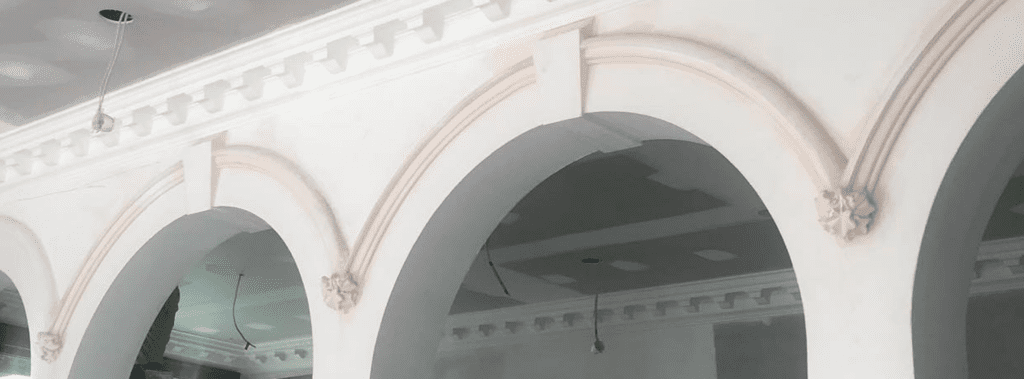
How do you receive the arch kit.
The kit is delivered as 2 arch sweeps and Corbels and Caps if ordered.
The pieces need to be assembled on the wall.
Building the frame.
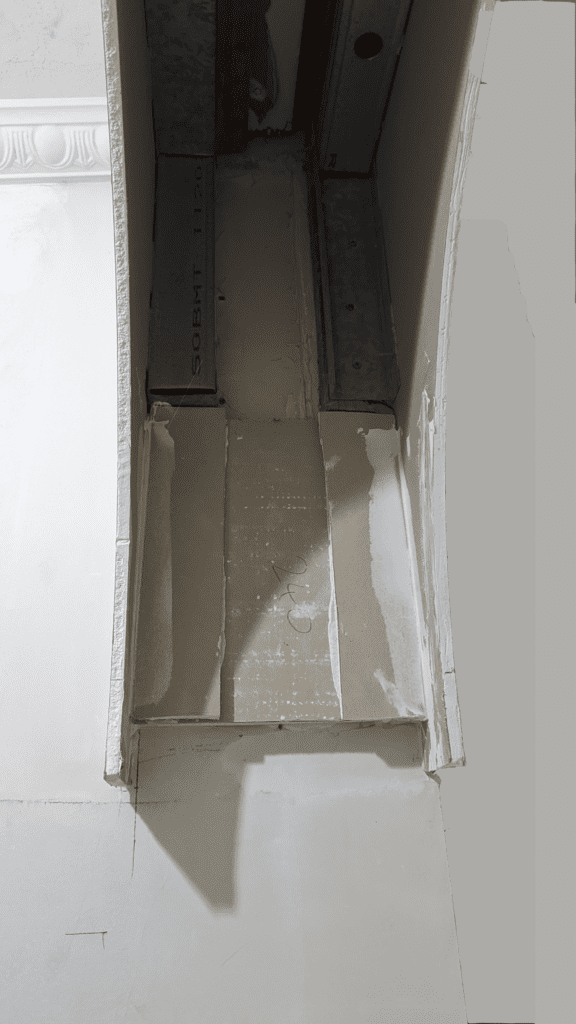
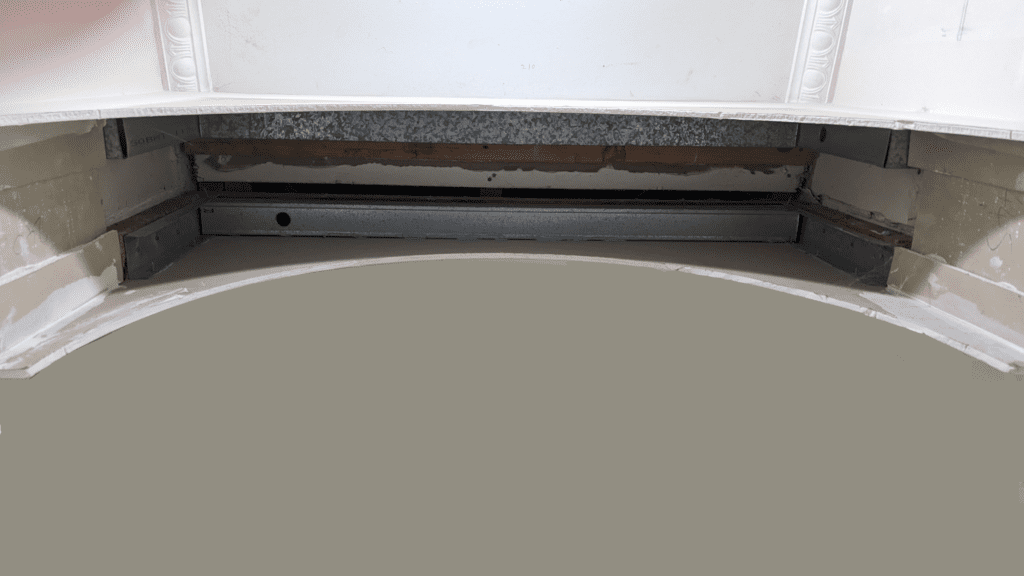
These images of an arch frame use steel stud. 90mm pine timber is often used instead.
The frame needs a few more bits.
A place to anchor the top of the infill and a piece each side to anchor the ends.
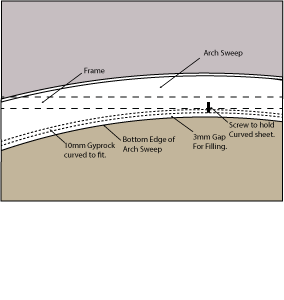
Arch Frame Detail
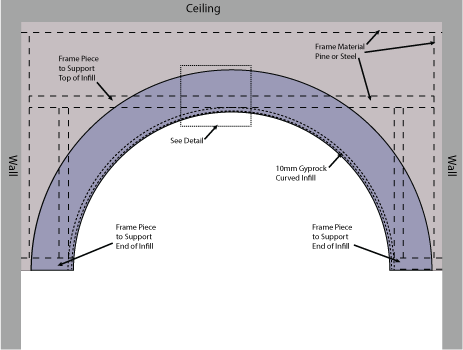
This detail of the Arch frame shows 3 important aspects of frame design.
- Cross piece to anchor top of infill
- End pieces to anchor ends of infill
- 3mm clearance between lower edge of sweep
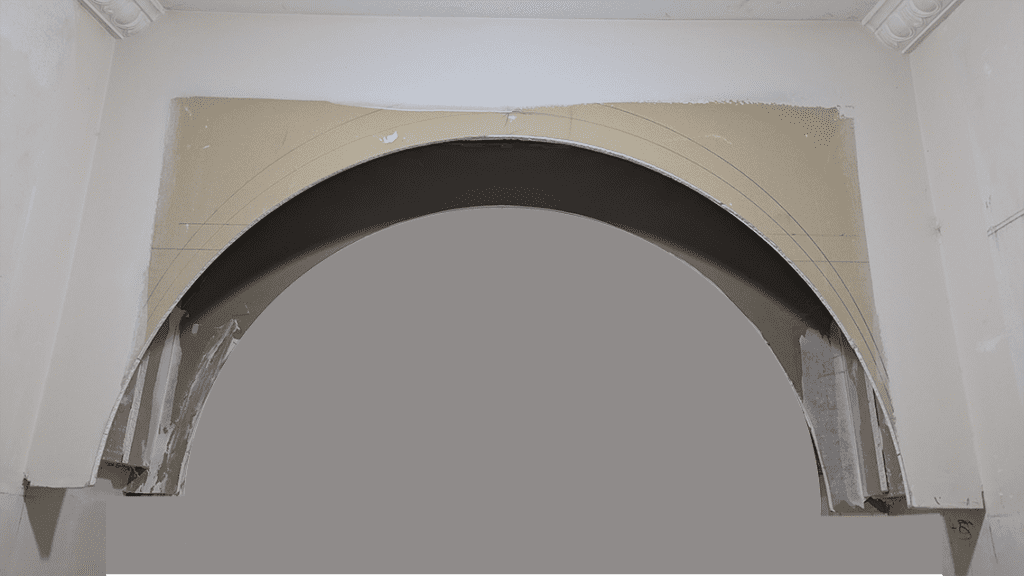
Install Sheets to Frame
The frame is then sheeted with 10mm plaster sheets. The arch arc can then be cut out. To mark the arc, find the exact centre between the lower ends of the frame and use a nail to anchor one end of a piece of string. The other end is tied around a pencil, this will allow you to make an accurate arc. The arc size should be 2 to 3mm greater than the arch sweeps to allow for stopping up.
Fit the arch sweeps.
The arch sweeps are stuck to the sheets with cornice cement.
Fit Infill
Cut a piece of plasterboard to fill the gap between the sweeps. Gently bend it to fit the curve of the arch, ensuring that it sits 2 to 3mm above the edge of the arch to allow for filling.
Select Corbels
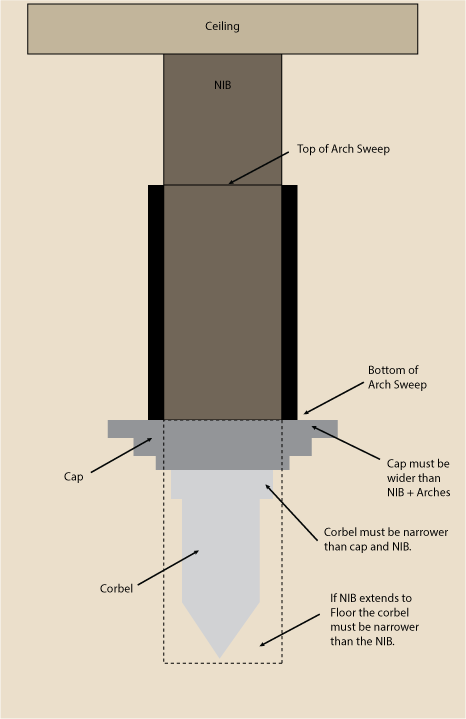
The critical measurement when selecting corbels is the width of the nib wall the arch is mounted on. The corbel may have a built-in cap, or it may require a separate cap. Either way the width of the cap must be greater than the width of the nib plus the thickness of the arch sweeps.
The schematic shows a section through the arch.
The critical points are:
- The cap, either built into the corbel or sepeate must be wider that the the width of the NIB plus the thickness of the arch sweeps.
- The corbel must be narrower than the base of the cap and if the nib continues to the floor narrower than the nib.
Fit corbels.
The corbels with or without separate caps are mounted with cornice cement.
Stop and finish arch.
The gap between the bottom of the arch sweep and the infill is then finished flush with the lower edge of the arch seep.